Getting started with Slack APIs & Postman

Slack is constantly pumping out new admin features and abilities to manage various roles, permissions, and analytics on the platform. Sometimes however, there is a problem that can't yet be solved through their admin user interface and it requires a more creative solution, like making changes directly in the backend of the application. This guide will walk you through setting up postman to make changes directly to slack using their public APIs.
This guide is intended for anyone who may not have experience with APIs or Postman as a tool. If you are a developer/IT engineer, the Slack guides on creating apps are likely a better source for following best practices, etc.
Quick Navigation:
Step One - Slack
Step Two - Postman
Download All Slack Web & SCIM APIs
Using the Downloaded Collections
Step One - Slack Setup
Slack has a great article on setting up a slack app and authenticating Postman using OAuth 2.0. If you are familiar with OAuth and are comfortable following those steps, feel free to do so. If not, here's another way that is a little more straightforward:
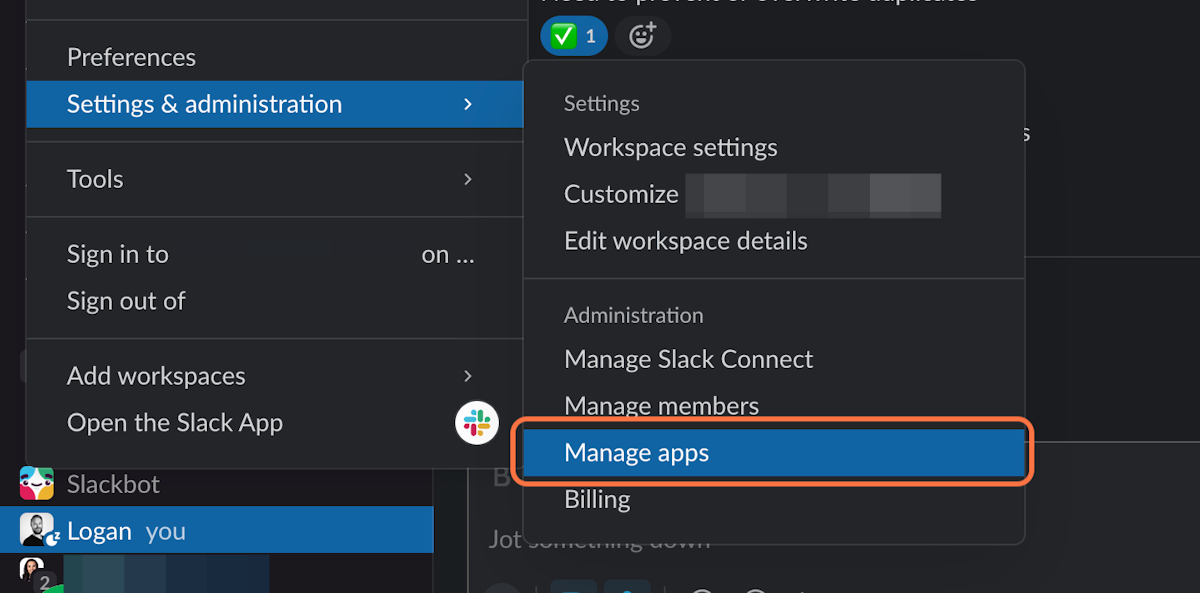
1. In your Slack workspace, select your workspace name in the top right, go to Settings & administration > Manage apps
2. Click on "Build" in the top right, then select "Create App" and choose "From scratch"
3. Enter an app name such as "Admin API" and select your workspace. (If you have multiple workspaces, select one for now and you can distribute the app across the Org later)
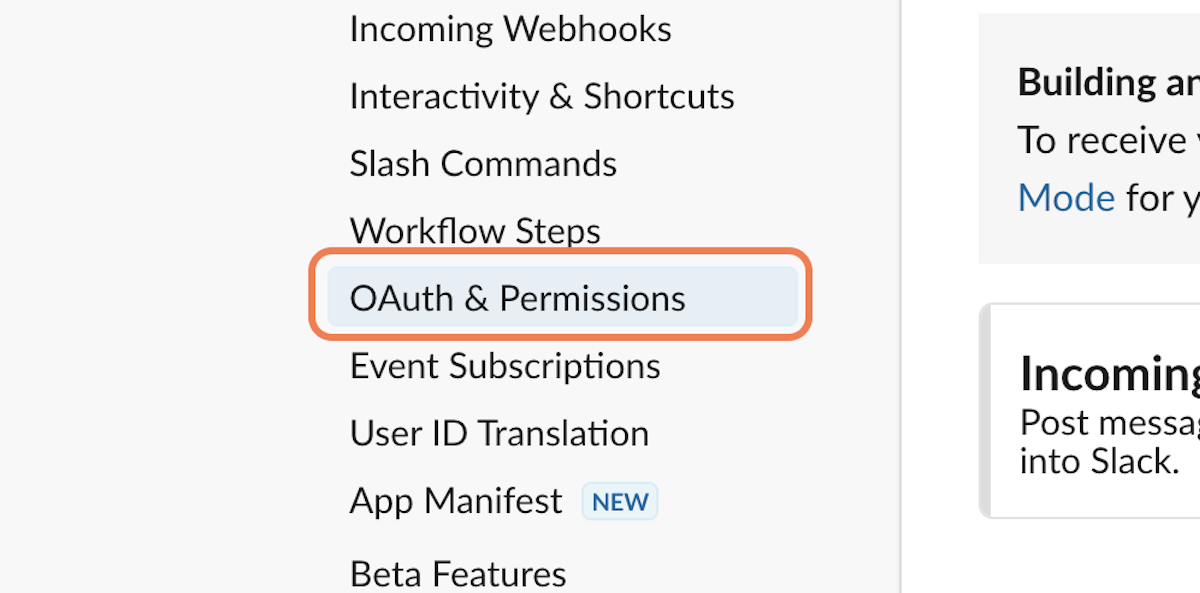
4. Click on OAuth & Permissions in the left panel
5. Here you will select the "scopes" that your "app" has access to. Scopes are basically permissions defining which features of Slack you can access. I recommend adding "User Scopes" as these are required for the Admin and SCIM APIs.
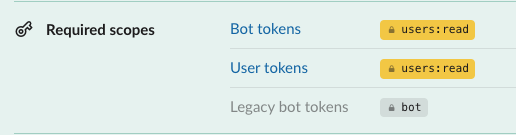
Every API requires different scopes, so please be sure to refer to the Slack API documentation for whichever API method you are trying to use. In this example, I will be using the users.list method to pull a list of all users in my Slack Workspace. Per the documentation page, I will need the following scope:
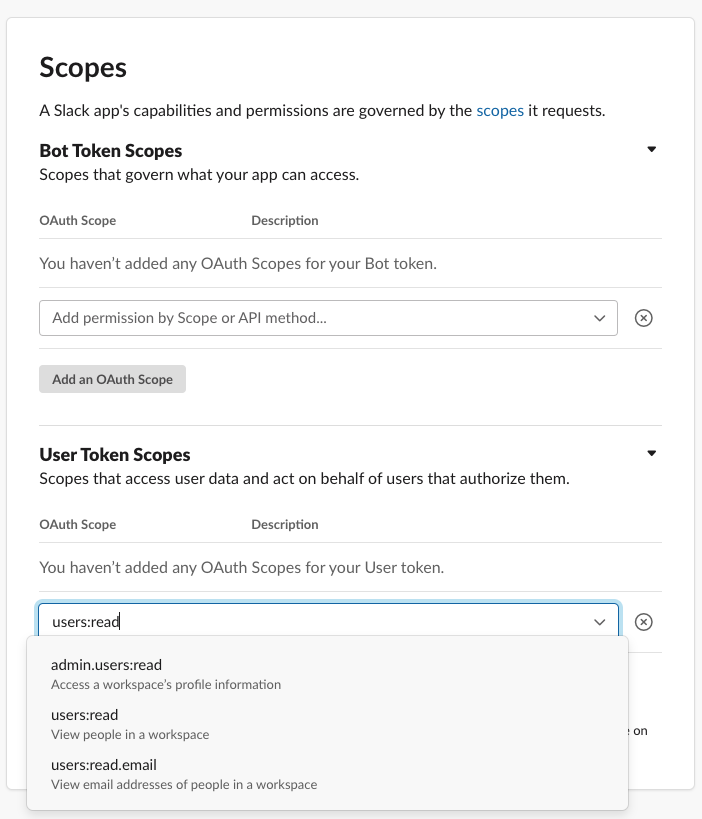
6. Scroll down to "User Token Scopes". Click "Add an OAuth Scope". Search for and select users:read
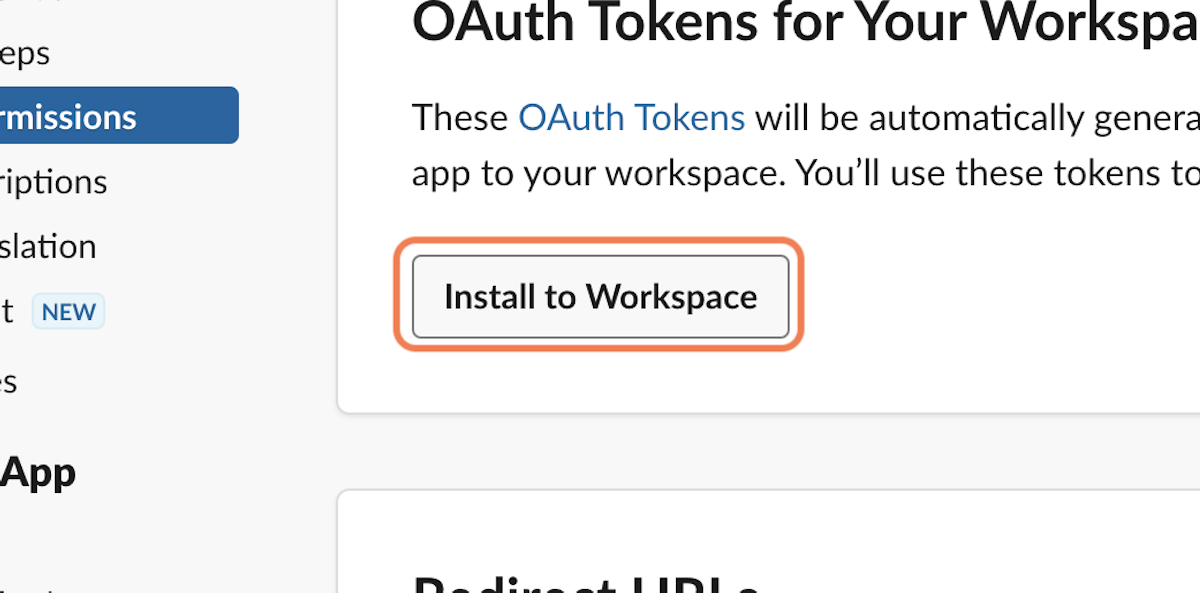
7. Click on "Install to Workspace"
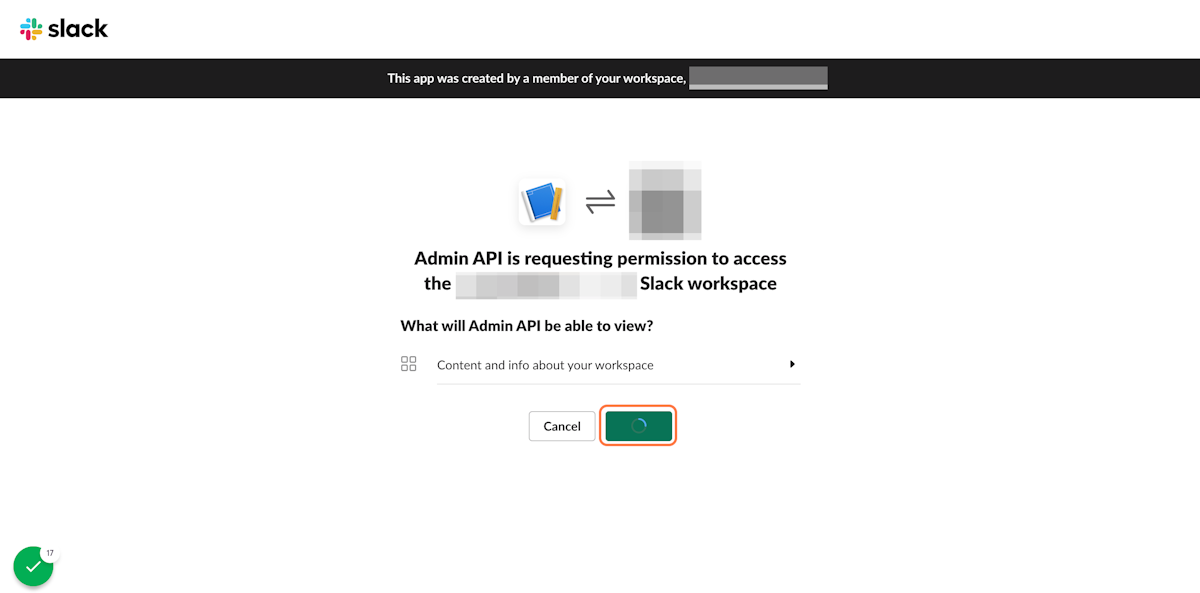
8. Click on "Allow"
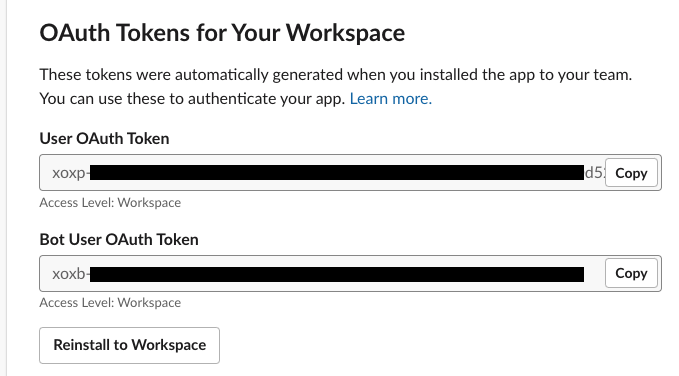
9. Congrats! You now have a token to authorize you for using Slack's APIs. 🎉 You will use this User OAuth Token in the next section to set up Postman.
*** If you are on Enterprise Grid, you'll want to also select "Install to Organization" and "Allow" in order for the token to access any workspace when needed.
Step Two - Postman Setup
- If you don't have one already, Create a Postman Account. Once signed in you can use the web version or download the Desktop app if your computer policy allows it.
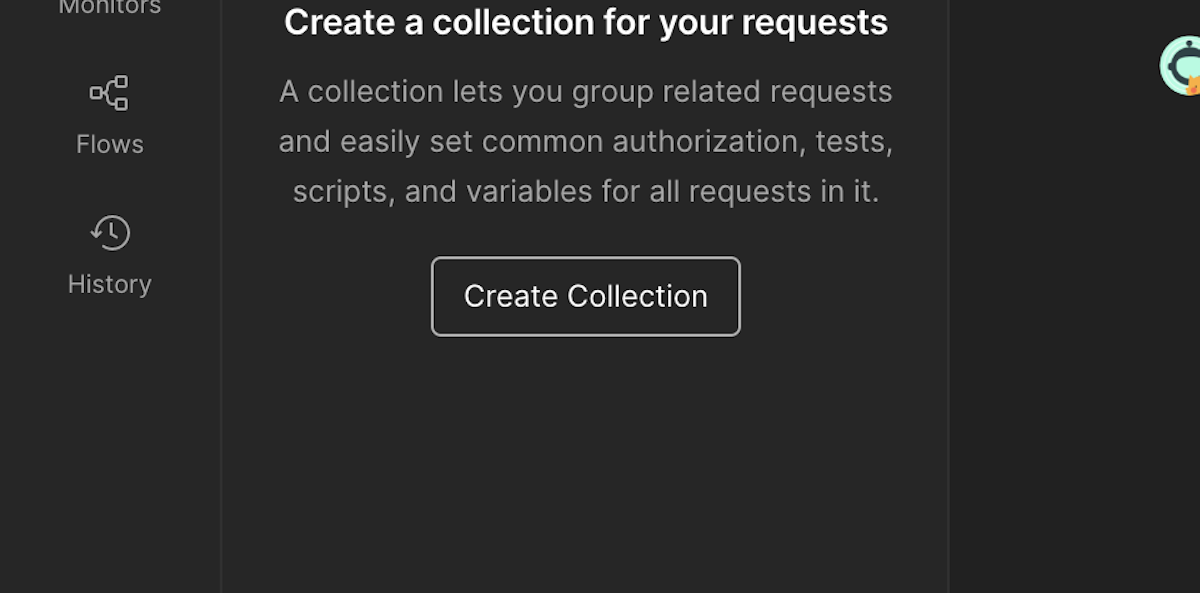
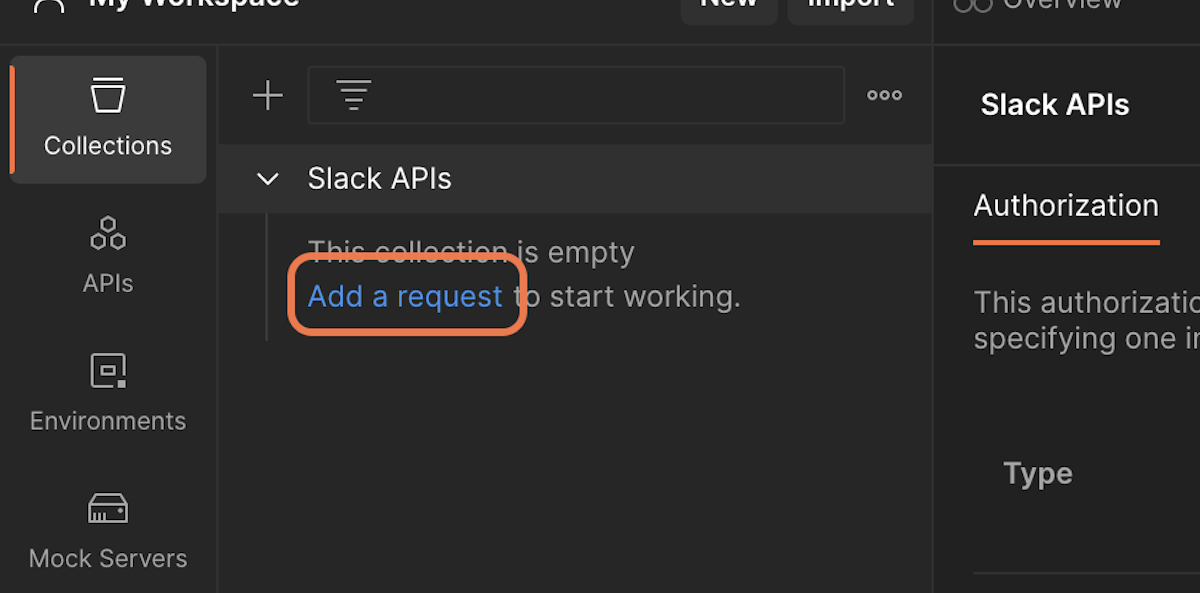
2. Create a new collection called Slack APIs (this is basically a folder to keep your requests organized)
3. Under the collection folder, select "Add a request"
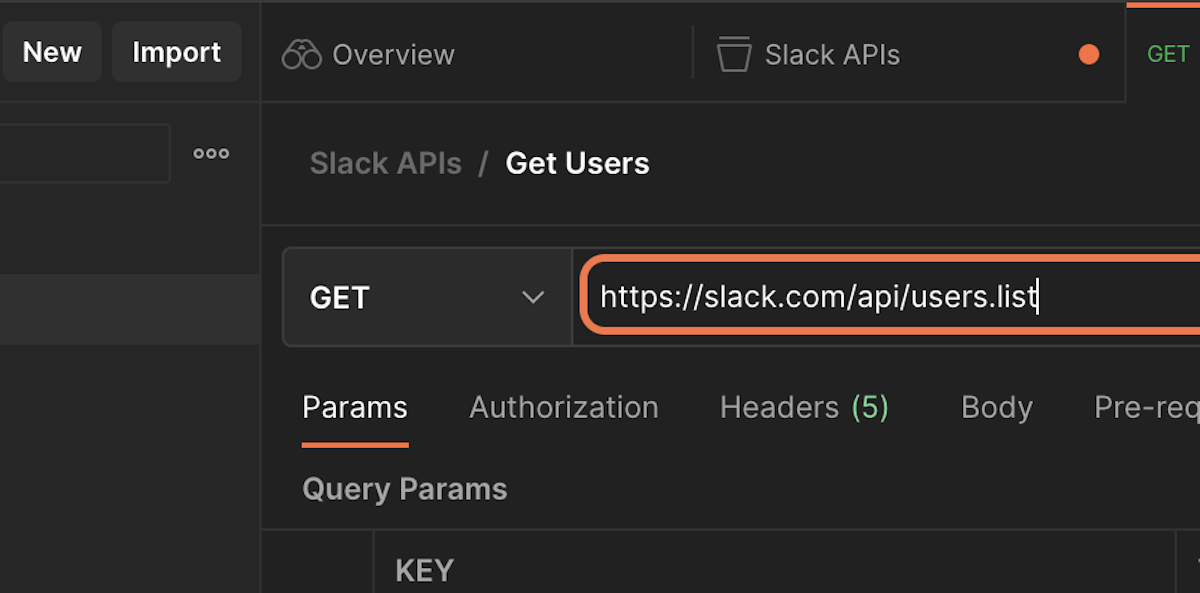
4. This is where you will be setting up your first request to Slack.
From the user.list documentation page, Copy the request endpoint: https://slack.com/api/users.list
5. Paste https://slack.com/api/users.list into the request URL
6. Click on the "Authorization" tab, then in the dropdown select Bearer Token
7. Paste the User Bearer Token from Slack you created in the previous section⬆ ️
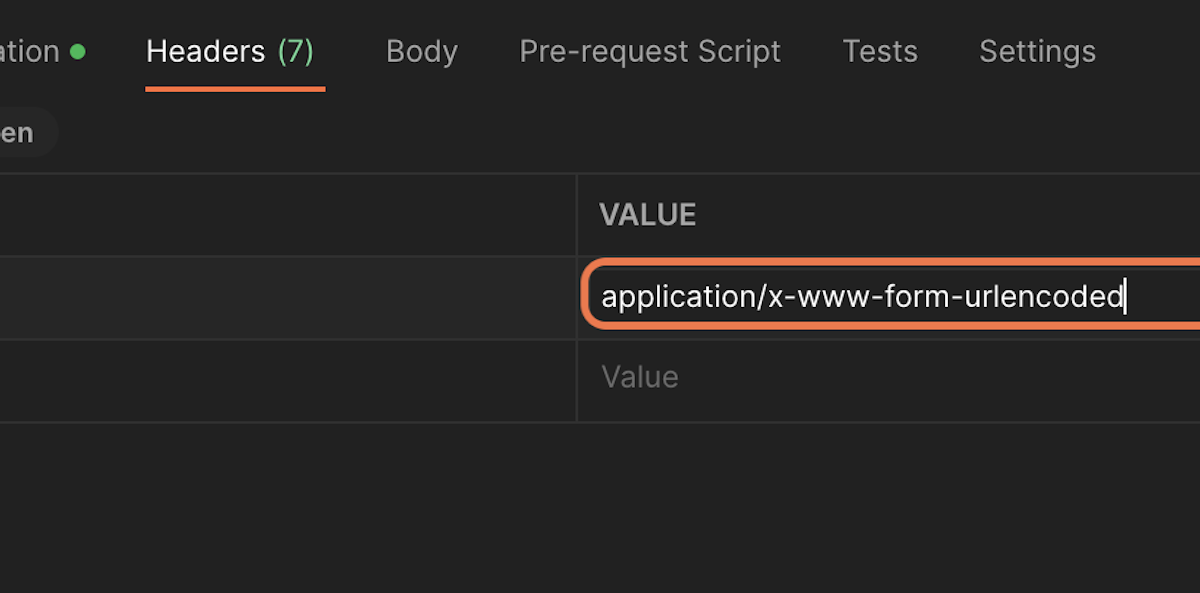
8. Click on the "Headers" tab
9. Type Content-Type in Key
10. Type application/x-www-form-urlencoded into Value. (This tells the Slack API what format/type of data you will be sending)
The next few steps are optional if you only have 1 Slack Workspace. However, if you are on the Enterprise Grid and have multiple workspaces, this field will be required.
11. Click on the "Params" tab
Note: This is where you will enter your parameters, sometimes referred to as Arguments. Similar to the scopes, each API method has different required and optional arguments that must be present for the API to understand what you are requesting.
- For GET Requests (reading information), the arguments go under the Params tab and get added to the request URL
- For POST Requests (writing information), the arguments go under the Body tab and get sent in the "Body" of the request.
12. Type team_id in the Key field
13. For the Value next to team_id, you'll need to get your Slack workspace team ID. You can find this by opening your Slack Workspace in your browser and looking at the URL

14. Once you have all the information entered, go ahead and hit "Send". You should quickly see a response show at the bottom of the screen that looks like this:

"ok": true means your success was successful and Slack understood what you were asking for and returned a list of all users and their information! 🚀
"ok": false indicates there was something wrong with your request. Typically it will give a specific error message that tells you what to fix. Slack will also list the errors and what they mean in their documentation.
Download All Slack Web & SCIM APIs
Now that you've set up your first Slack API request and have a basic understanding of Postman, you can save yourself a ton of time by importing all of the Slack Web APIs in a collection created by the Slack team. Clicking the button below will automatically create a "fork" or a copy of the collection. Be sure to add it to your own private workspace so your changes and tokens can't be seen by others.

Since the above collection only has the Admin and Web APIs, I went ahead and created one for SCIM as well:
Using the Downloaded Collections
Once you have both collections in your workspace, you'll notice a few things are different than when we manually set up the request above.
The first and most important thing is the Authorization. When you click on a request in one of the sub-folders, you'll notice the Authorization tab has selected "inherit auth from parent". This is a feature of Postman that allows you to input your bear token at the top-level folder and all requests underneath will use that token.
Click on the collection name, or the top level folder, and select the Authorization tab. It should already have Bearer Token selected for the Type, if not choose that option. In the Token field, you'll notice an orange word surrounded by four curly brackets, this is actually a variable that is used to insert the token rather than storing the token in the collection itself.
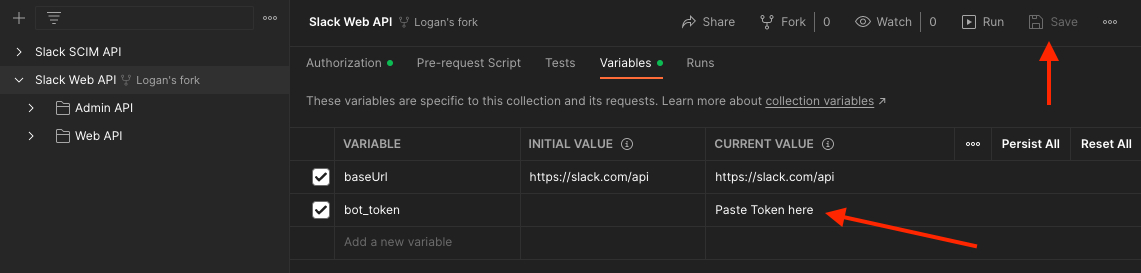
Select the "Variables" tab and you'll see the token variable. Paste your bearer token from the Slack Setup section into the current value. IMPORTANT: Click "SAVE" at the top. Now you should be able to run all of the requests within that collection without issue.
Next, if you select a request again, you'll notice the URL field also has a variable. This variable is the slack base URL and is the same for all requests. Postman automatically inserts the base URL into the request when you send it.

That's it! You're now fully set up to use all of the APIs do your hearts desire. It goes without saying please be careful when using APIs in a production/live Slack workspace. GET requests won't do much harm but be careful using POST PATCH PUT or DELETE. If it all possible I'd recommend talking with your Slack account rep and getting a secondary "sandbox" environment so you can play around and really get a feel for things without causing any potential harm.
If you found this guide helpful, please share & subscribe to stay updated on new articles!
Member discussion