Part 2: Using AWS KMS for Enterprise SaaS
This is a continued guide to using BYOK (Bring Your Own Key) for Enterprise Saas Applications. If you haven't already, please check out Part 1.
Quick Navigation
Overview of Key Operations
Revoking Keys by Editing the Policy
Key Rotation
Accessing Logs
Monitor Costs
Overview of Key Operations
When it comes to SaaS Security, there are 3 categories I like to separate my solutions into. They are Passive, Reactive, and Proactive. In the last article, you configured AWK KMS with a minimum policy and your own keys. This provided "Passive" security by having all data encrypted with your own keys instead of the vendors, and no further action is needed.
The next part of Key Management is the Reactive portion. Once BYOK is in place, it's not just about owning your own keys and data, but also revoking access to that data when needed. If you're new to Key Management you might be wondering, "why would I need to revoke access?".
Using the Key Policy, you can revoke very specific portions of data within a Saas Application. Rather than deleting something you don't want stored the tool, you can re-encrypt the data and prevent end users, and even the Saas vendor themselves from viewing it. The most common use cases are:
- You are notified that an end user has shared High Confidential data and it needs to be removed
- A suspected security breach
- Compliance or legal concerns
- HR Investigations
Revoking Keys by Editing the Policy
1. Go to your KMS Console
2. Make sure you have the right region selected in the top right
3. Click on Customer managed keys on the left side
4. Select the key you want to edit
5. Click on Switch to policy view
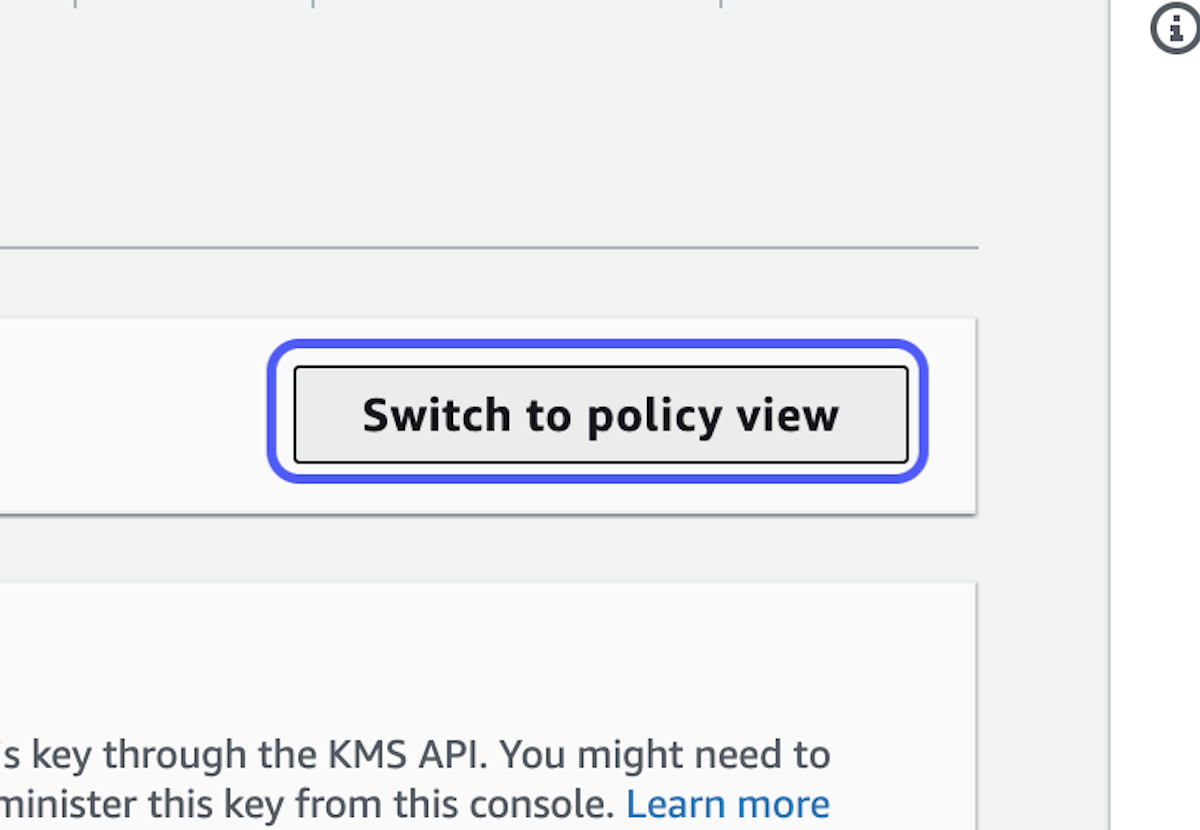
6. Click on Edit
7. Add your policy update
- Locate the last curly bracket before the closing square bracket, and start a new list object by adding a comma then paste your policy code on the next line down.
- You'll need to refer to your vendor-specific documentation on what policies and targetted data revocations are supported, and get the proper JSON syntax to paste in.
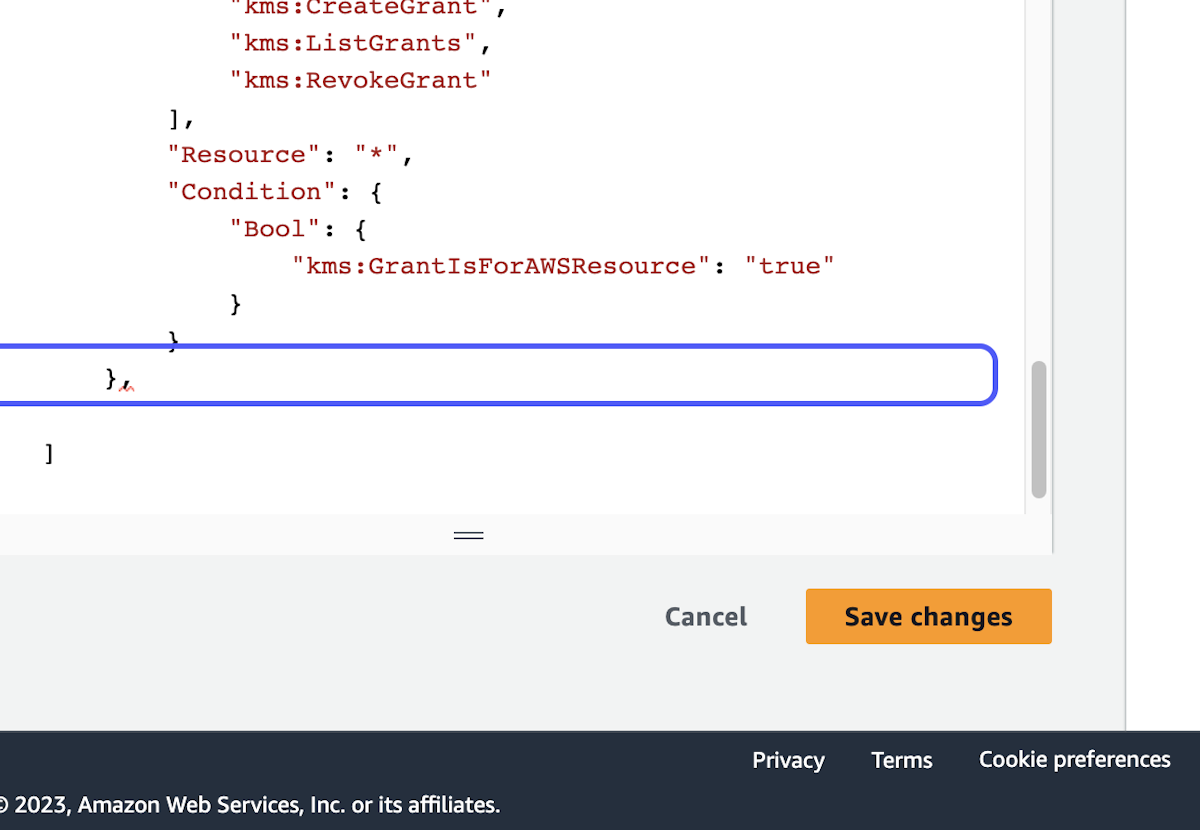
8. Make sure the effect for this new policy addition is set to "Deny"

9. Click on Save changes
You should now no longer be able to see that piece of data in your Saas App.
Key Rotation
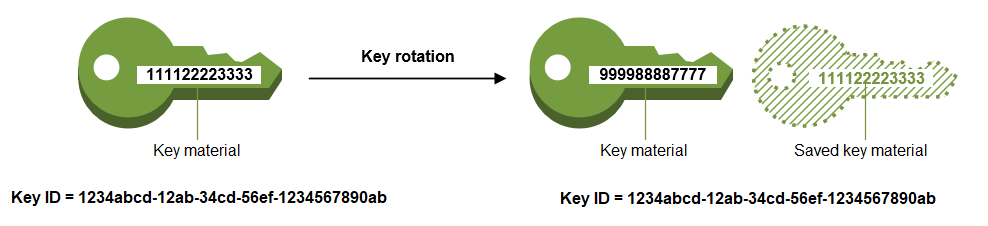
Key rotation is when a key is retired and replaced by generating a new key to be used for encryption. Rotating keys on a regular basis is an industry standard and follows security and encryption best practices. Why? Rotating keys ensures that if the wrong person were to get access to a key, or someone with authorized access to a key were to incorrectly share/store it, it's less likely that they'll be able to gain access to data since a new key is being used.
Some industry standards, such as Payment Card Industry Data Security Standard (PCI DSS), require the regular rotation of keys. The U.S. National Institute of Standards and Technology (NIST) recommends that cryptographic keys be changed at least every three years. However, many companies rotate keys yearly at a minimum, and sometimes even quarterly.
How to rotate your keys
You have the option to manually rotate the CMK (Customer Master Key) yourself on a schedule based on your company's policies, or you can set up an automatic key rotation.
- Manual rotation simply requires completing the steps found in Part 1 again and providing the new key to your SaaS Vendor. This is more cumbersome but gives you more control on timing and coordinating with the vendor.
- Automatic rotation completes the process in an automated fashion inside AWS KMS on a yearly basis, but still requires the new key to be shared with the vendor manually. A risk here is the key getting rotated automatically by KMS and you or your team forgets to share this with the vendor. At that point, users and the vendor will lose all access to data until the new key is corrected. If you'd still like to proceed, you can simply select your key in the KMS console, choose the Key rotation tab, and select the Automatically rotate this KMS key every year check box.
If interested, you can take a deeper dive here:

Accessing Logs
You or your security team may need to access your KMS logs to investigate a security breach or suspicious activity. As mentioned in the setup article, there are 2 different sets of logs. CloudTrail and CloudWatch. CloudTrail is generated by AWS each time an API event is logged using your key. CloudWatch logs are generated by the vendor and typically include more detail such as reason codes for key events.
To Access CloudTrail logs:
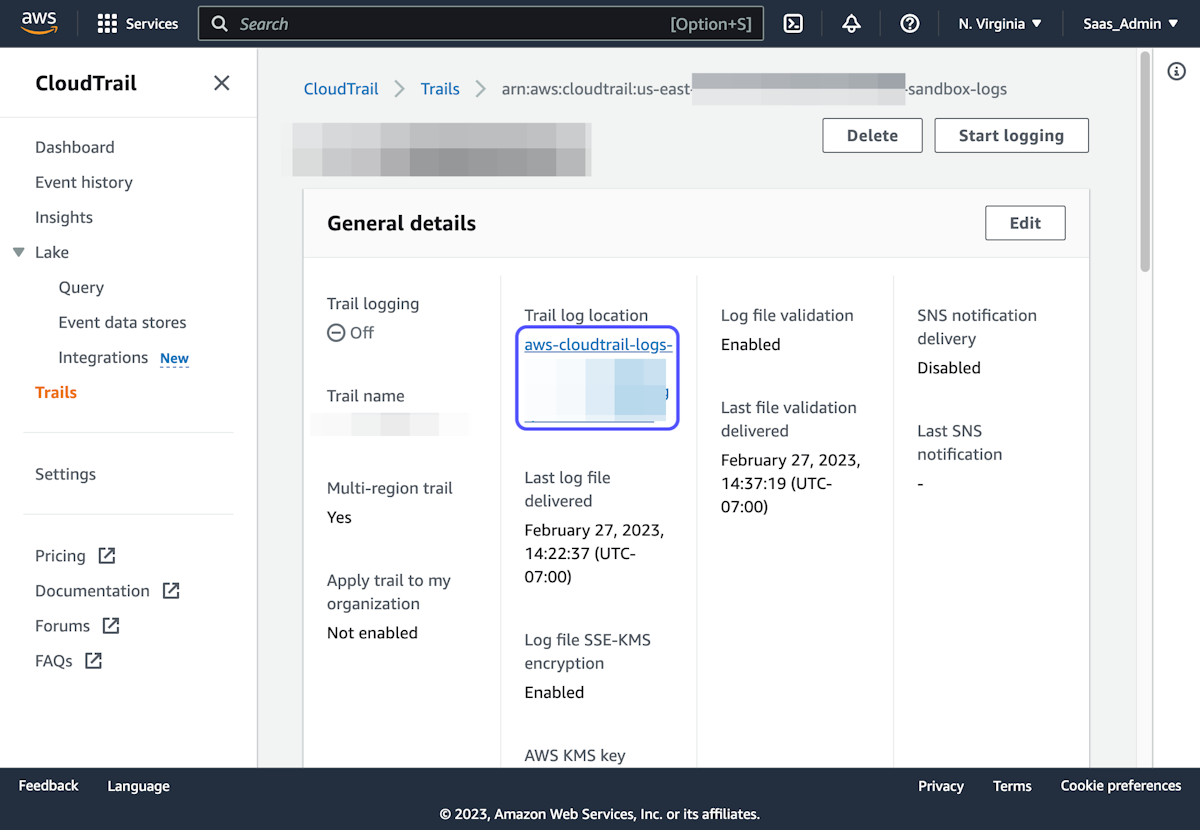
- Go to the CloudTrail Dashboard and select the Trail for the app/environment you need
- Click the link under "Trail log location"
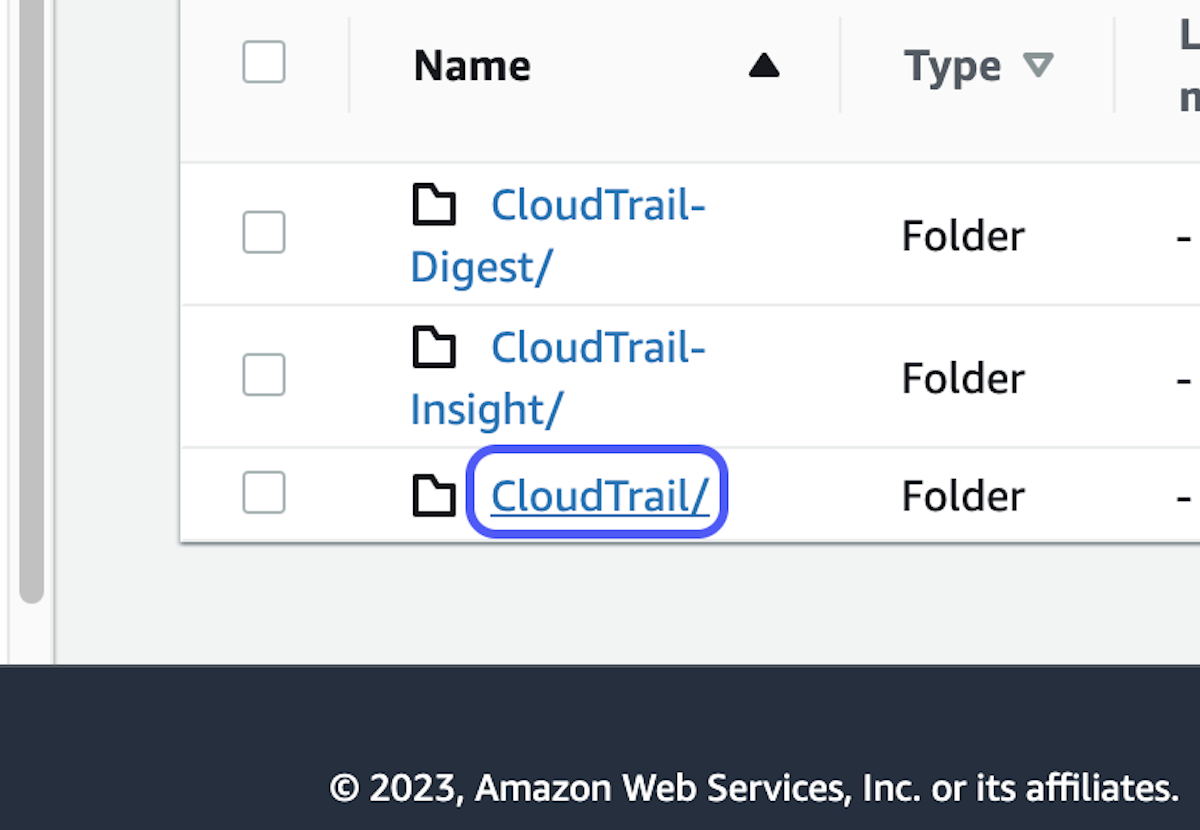
3. Click on CloudTrail/
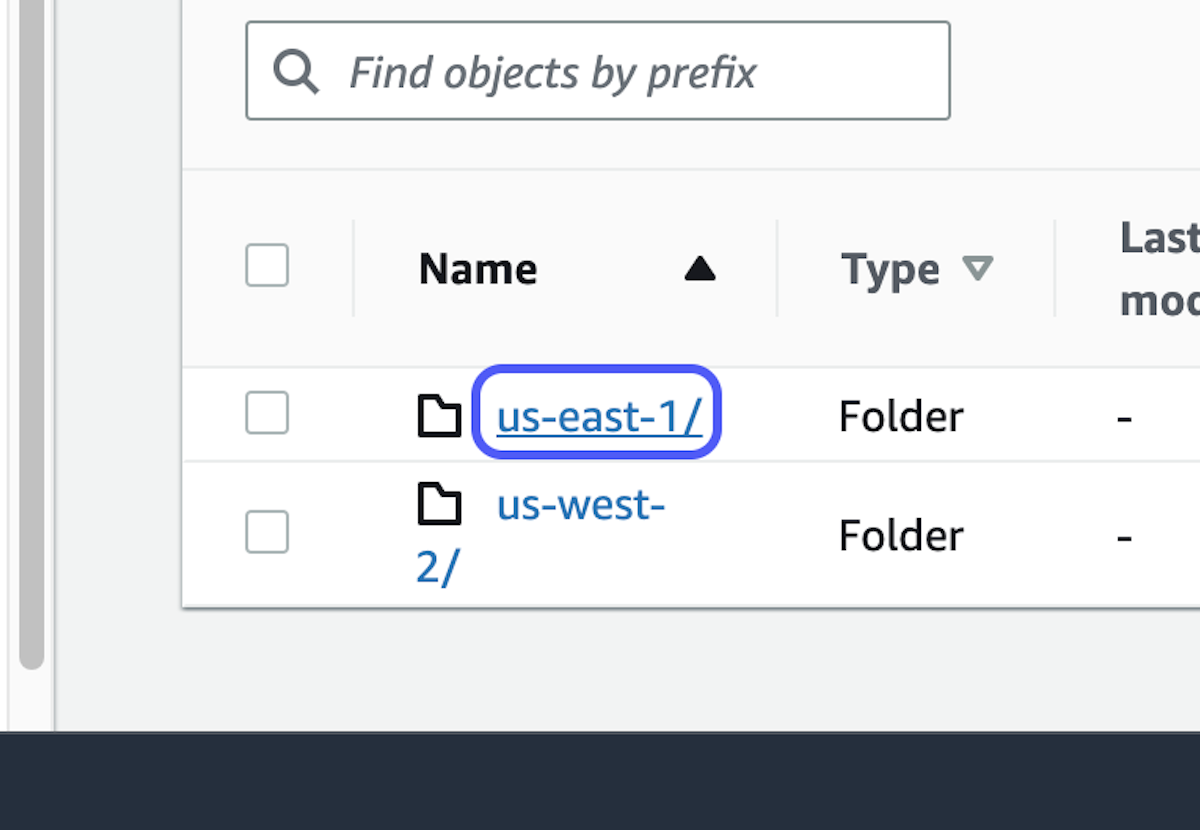
4. Select your region
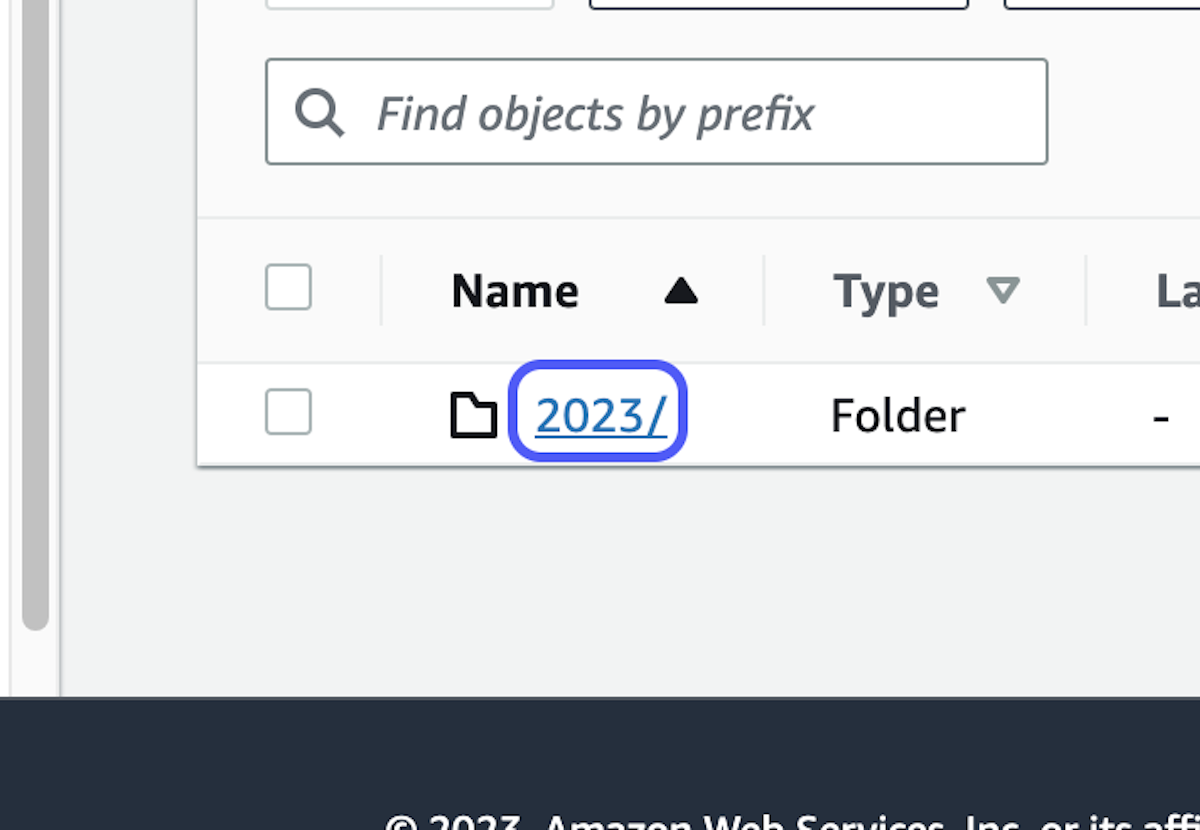
5. Select the folder corresponding to the year, then the month, and finally the day
6. Select the log for the timestamp of the event in question

7. Click on Download
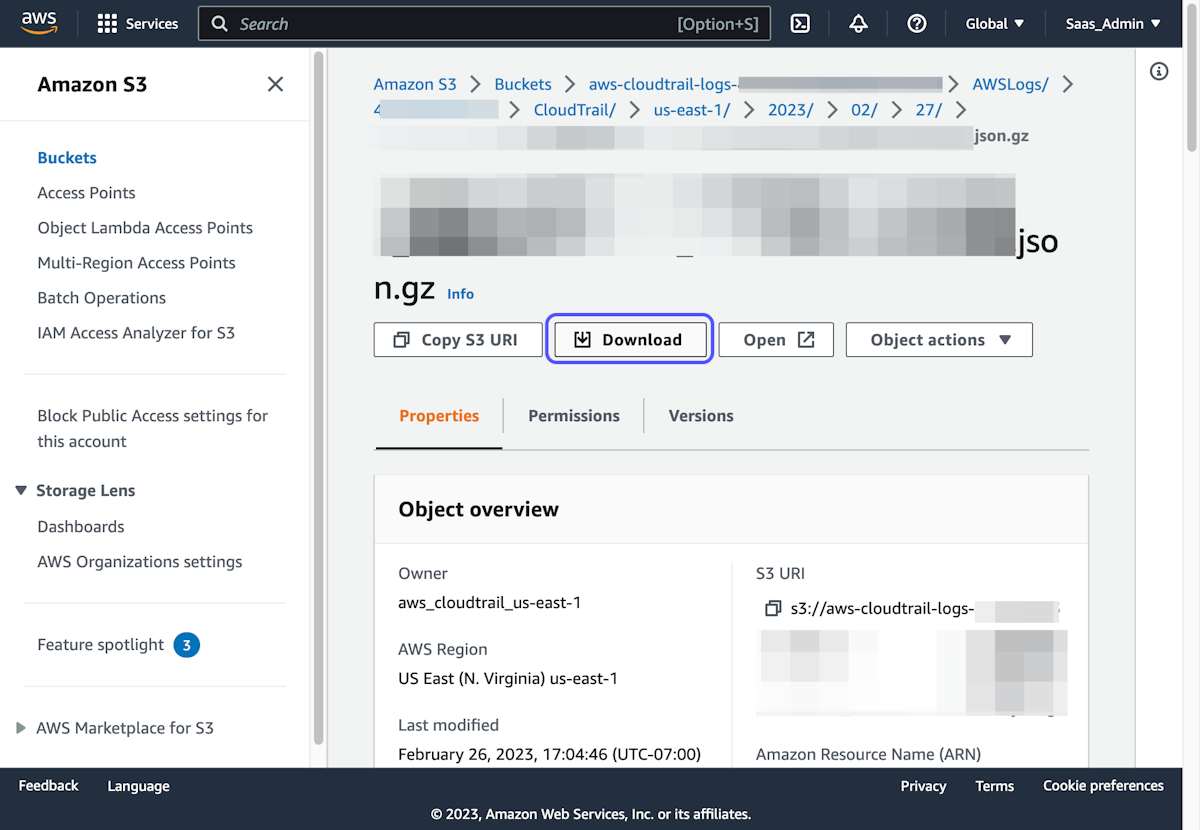
8. Open the logs in a JSON Viewer of your choice, such as Notepad++, VSCode, or a Browser Extension)
To Access CloudWatch logs:
- Open the CloudWatch Console
- On the left side menu, expand Logs and click on Log groups
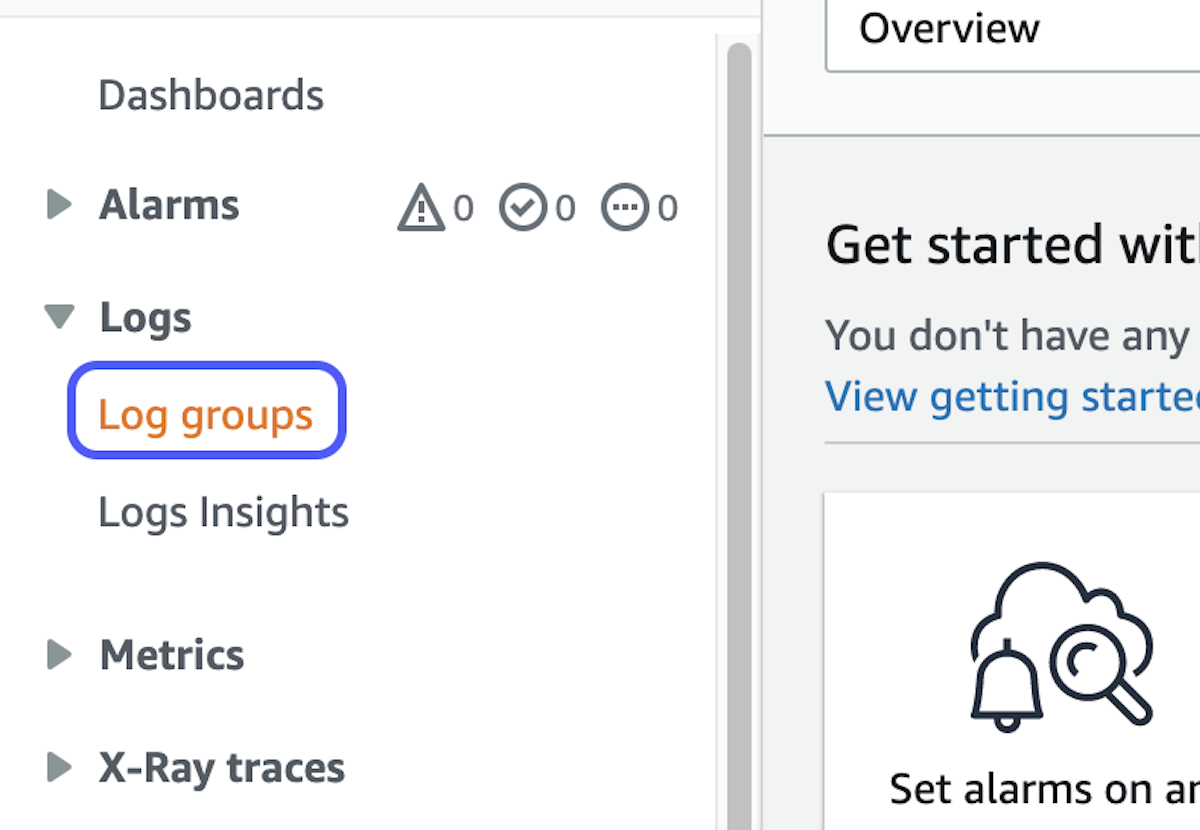
3. Select your log group
- If you do not see any, make sure you have the correct region selected in the top right
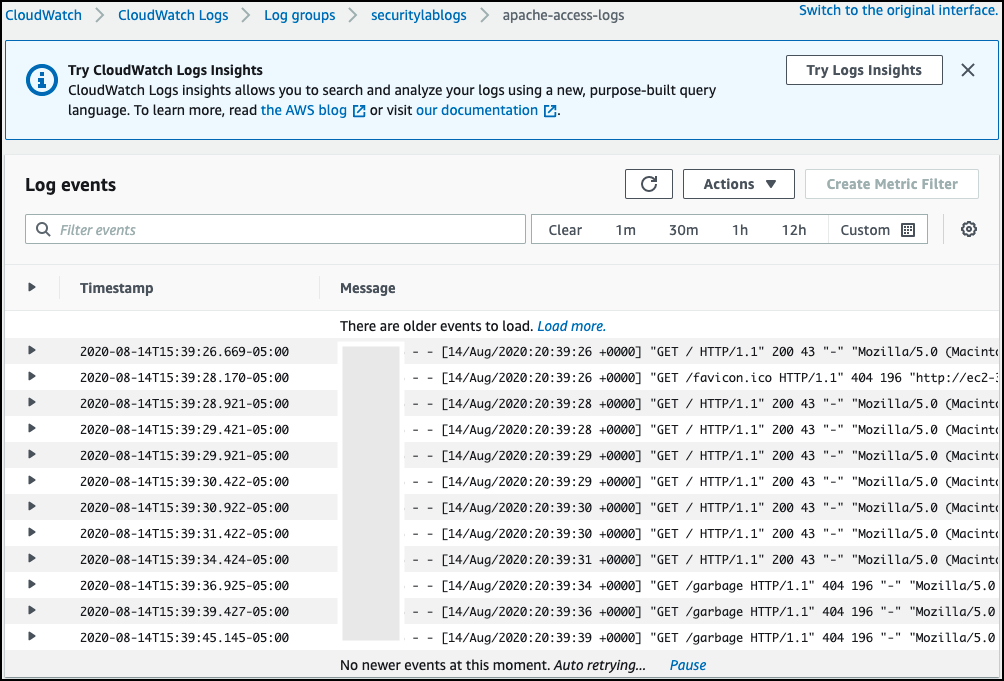
4. Under Log Streams, select the event during the timeframe in question
5. Locate the timestamp and expand the log to view the data
Rather than monitor your logs manually, you can also set up Metric Filters in AWS:
Monitor Costs
It's important to note that each feature of KMS (Key Creation, CloudTrail, and CloudWatch) has cost associated with it based on usage over time. CloudWatch specifically can add up quickly based on how often the vendor is sending logs. You can keep an eye on things in the AWS Billing Console or Cost Explorer.
If you found this guide helpful, please share & subscribe to stay updated on new articles!
This week's post is supported by:

Strongest security. Easiest compliance. Try Vanta free for 7 days.
To close and grow major customers, you have to earn trust. But demonstrating security and compliance can be time-consuming, tedious and expensive. Unless you use Vanta. See if Vanta is right for your business with a free trial of our SOC 2 compliance framework and Access Reviews solution.
Start your free trial
Member discussion